Connect Cursor to an MCP Server
This guide explains how to connect an MCP server to Cursor, enabling you to interact with your API using natural language directly from your development environment.
Interactive Configuration Generator
🛠️ Configuration Generator
Select your authentication type and fill in your details to generate a personalized configuration:
📂 Configuration Locations:
- Project Configuration: Create
.cursor/mcp.jsonin your project root for project-specific tools - Global Configuration: Create
~/.cursor/mcp.jsonin your home directory for tools available everywhere
💡 Use the “Add to Cursor” button for quick installation, or copy the configuration to your preferred location.
Generated Configuration
{
  "mcpServers": {
    "my-mcp-server": {
      "command": "npx",
      "args": [
        "mcp-remote",
        "https://your-mcp-server.com",
        "--header",
        "API_Key: ${API_KEY}"
      ],
      "env": {
        "API_KEY": "your-api-key-here"
      }
    }
  }
}
Before You Start
Before connecting Cursor to your MCP server, make sure you have:
- The Cursor editor installed and running.
- One of the following:
- A local MCP server generated with liblab CLI.
- A publicly deployed MCP server URL generated on your liblab dashboard.
To learn more about how MCP works, visit the MCP Concept page.
Connect Cursor to a Remote MCP Server
Use this method if your MCP server is deployed and accessible over the internet through an URL. If you generated your MCP server using the liblab hosting service, use this option.
-
Open Cursor Desktop and go to Settings > Developer > Edit Config.
-
Use the interactive configurator above to generate your configuration with proper authentication. You can either:
- Use the "Add to Cursor" button for quick installation via deeplink
- Manually copy the configuration to your MCP config file
-
For manual configuration, go to Settings > Developer > Edit Config, select MCP Tools and click Add Custom MCP to open the
mcp.jsonfile. -
Cursor will fetch the MCP Tool and list them indicating the connection was sucessfull.
-
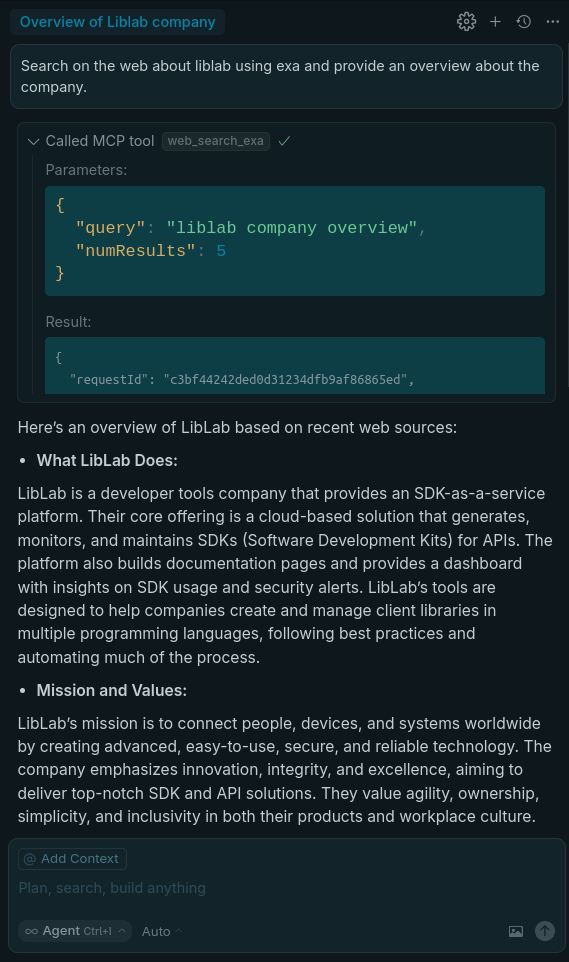
Once connected, you can chat with your API using natural language right inside Cursor. Cursor will ask your permission before performing any request to the MCP.
Connect Cursor to a Local MCP Server
Use this method if you’re running the MCP server locally, generated from an OpenAPI spec using liblab CLI.
If you haven’t yet generated your MCP server, follow the Generate an MCP Server with liblab CLI guide.
After generating the MCP server using liblab CLI, run the setup and start the local server:
cd output/mcp
npm run setup
Now, you need to update Cursor's settings:
-
Open Claude Desktop and go to Settings > Developer > Edit Config.
-
Select MCP Tools and click Add Custom MCP. Cursor will open the
mcp.jsonfile.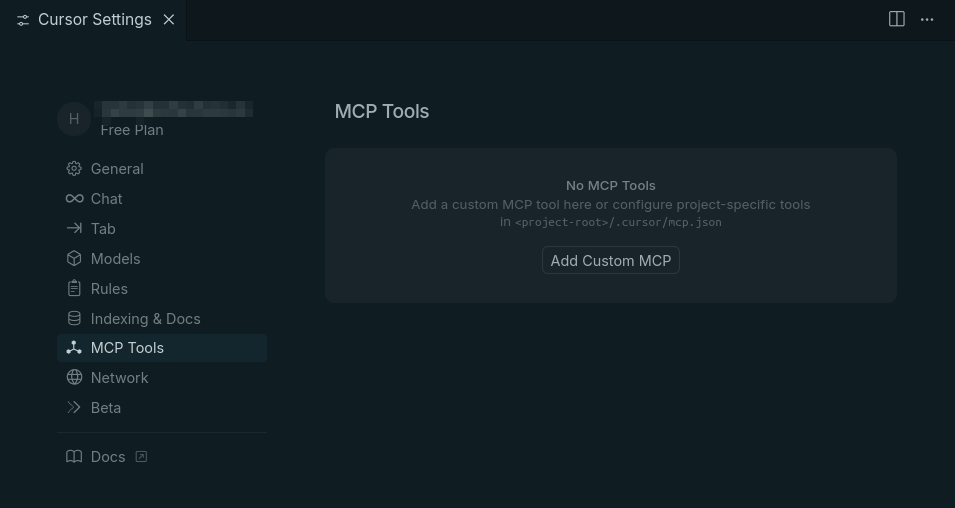
-
Add your MCP server configuration using the hosted MCP URL. Replace the placeholder URL and environment variable with your actual values. Save and close the
mcp.jsonfile.mcp.json{
"mcpServers": {
"your-local-api": {
"command": "node",
"args": [
"<path-to-liblab-generated-mcp-server>/output/mcp/dist/index.js"
],
"env": {
"YOUR_API_KEY": "<your-api-key>"
}
}
}
}MCP server authenticationMake sure to use the correct environment variable name expected by your API.
-
Cursor will start the local MCP server and get the tool available, listing them to indicate the connection was sucessfull.
-
Once connected, you can chat with your API using natural language right inside Cursor. Cursor will ask your permission before performing any request to the MCP.
Next Steps
To continue working with MCP and Cursor, check out the following resources: