End-to-end SDK generation and publishing with GitHub Actions
This tutorial shows you how to use GitHub Actions with liblab to automate the SDK generation and publishing process for an existing project. You'll learn how to configure CI/CD workflows that automatically generate and release SDKs to public package managers like npm, PyPI, NuGet, Maven, Go Packages, and Packagist.
Ensure that you:
- Have a working liblab project with a valid OpenAPI spec and
liblab.config.jsonfile. - Are familiar with GitHub Actions workflows. If you're new to GitHub Actions, you can find more information in the GitHub Actions documentation.
- Have an account on the package management platform(s) you want to deploy your SDKs to (ex. NPM, PyPi, Maven). This guide will help you with all of the other deployment details.
This guide doesn't cover setting up a new liblab SDK project.
If you don't have a liblab SDK project yet then you'll first want to follow one of our framework guides or general getting started guide.
Structural Overview
Your completed project will consist of:
- Your existing liblab project repository which we'll refer to as the "Control Repo"
- One SDK repository per SDK language you want to publish which are your "SDK Repos"
When you complete the tutorial, the project repository structure will look like the example below.
Where each SDK repo will have the following organization:
- TypeScript
- Python
- C#
- Java
- Go
- PHP
Any change to the API spec or liblab configuration in the Control Repo will trigger SDK builds and create pull requests (PRs) in the respective SDK repositories.
You can find a video version of this tutorial on the liblab YouTube channel
Set up the Control Repo
First, you'll need to set up your GitHub Workflows. Run the following command from the root of your project:
curl --create-dirs --remote-name-all --output-dir .github/workflows "https://raw.githubusercontent.com/liblaber/control-repo-template/refs/heads/main/.github/workflows/{liblab-generate-sdks.yaml,liblab-sdk-updates.yaml}"
This command downloads the official liblab GitHub Actions files (liblab-generate-sdks.yaml and liblab-sdk-updates.yaml) and places them in the .github/workflows directory of your Control Repo.
This is what you should have so far:
Create SDK Repos
Your generated SDKs live in separate repos, one per SDK language.
Templates are available for each language. Click the links below and follow the instructions to create a new repository for each SDK language you want to publish.
This is what you should have so far:
Create liblab and GitHub tokens
- A liblab token for authenticating the liblab CLI.
- A GitHub token to let the liblab CLI to push to your SDK repos.
Create a liblab token
By default, this token will expire after 90 days. You can increase this to up to 364 days by passing the --durationInDays parameter.
Read more on the liblab token command in the CLI documentation.
For guidance on setting up secrets in GitHub, refer to the GitHub secrets documentation.
To generate a liblab token, run the following command from your terminal:
liblab token create GITHUB_PR_TOKEN
You can replace GITHUB_PR_TOKEN with any name you prefer. If you're generating SDKs for multiple APIs, you can either share the token between them or create separate tokens for each API.
Token successfully generated, it will be valid for 90 days

-TOKEN-----------------------------------------
liblab_HYeJzYb5CO3t7JaW4I6ZWKNKbOGp01MqqYSTS6yG
-----------------------------------------------
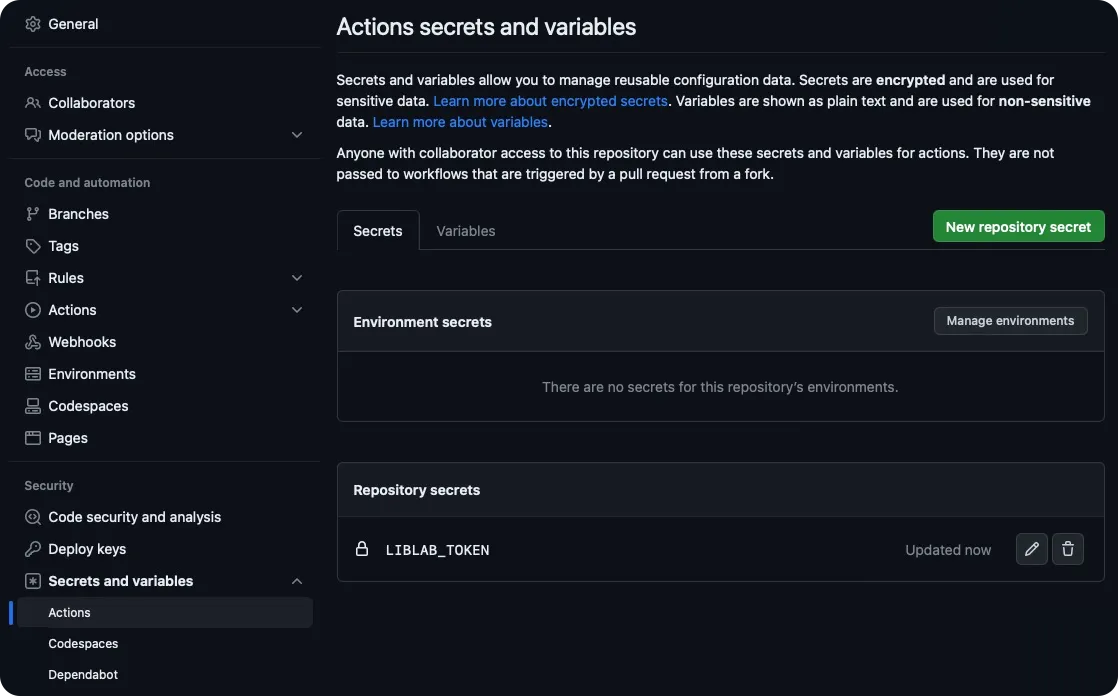
Copy the token (e.g., liblab_HYeJzYb5CO3t7JaW4I6ZWKNKbOGp01MqqYSTS6yG) and save it somewhere safe. Then, add it to your Control Repo's GitHub Actions secrets as LIBLAB_TOKEN.
Create a GitHub token
It's helpful to create a reminder for yourself such as a calendar item to refresh your liblab and Github tokens just before they expire!
For the Action in your Control Repo to push to your SDK repositories, you'll need to generate a GitHub Fine-Grained Access Token with the right permissions. Follow these steps:
-
Open GitHub's fine-grained token settings and click Generate new token.
-
Enter a descriptive name and description for your token.
-
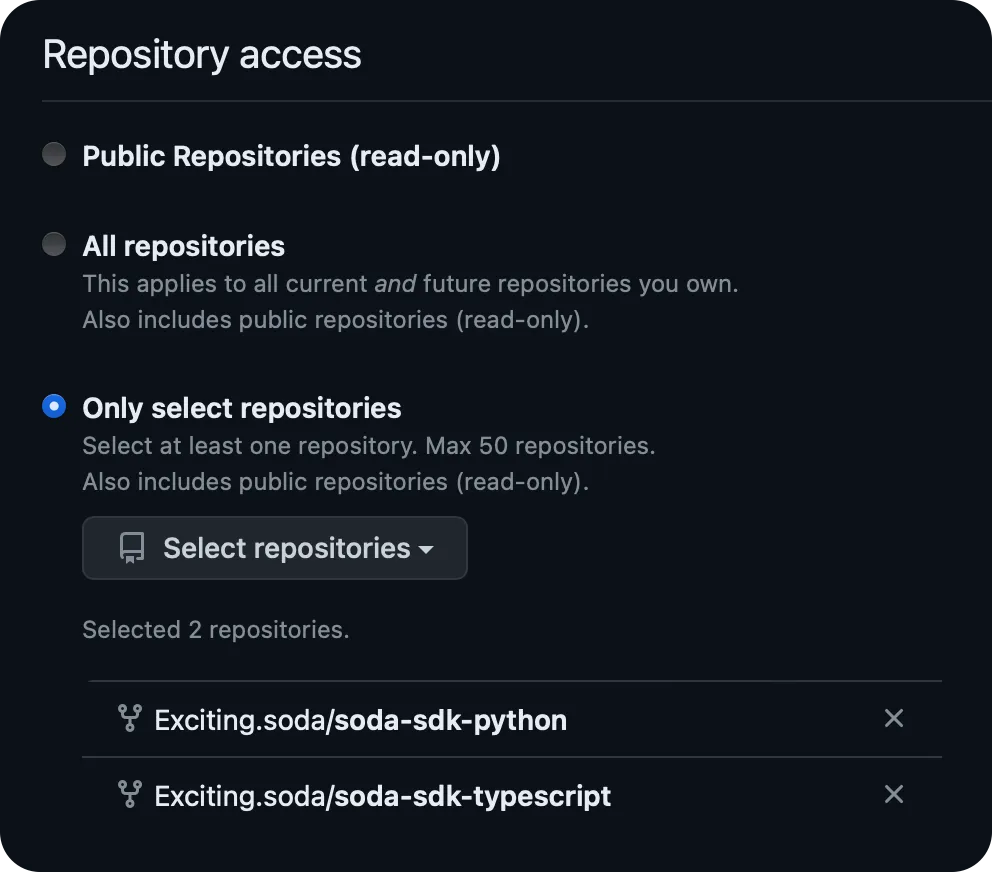
Select the repositories this token should have access to. It's best to limit the scope of these tokens, so select only the SDK repositories you want to publish to.
-
Set the token permissions. This token will need the following permissions:
Permission Access Commit Statuses Read/Write Contents Read/Write Metadata Read Pull Requests Read/Write Workflows Read/Write -
Copy the generated token and add it to your Control Repo's GitHub Actions secrets as
LIBLAB_GITHUB_TOKEN.
This is what you should have so far:
Create package manager tokens
Depending on which SDK languages you're using, you'll need to create additional secrets.
- TypeScript
- Python
- C#
- Java
- Go
- PHP
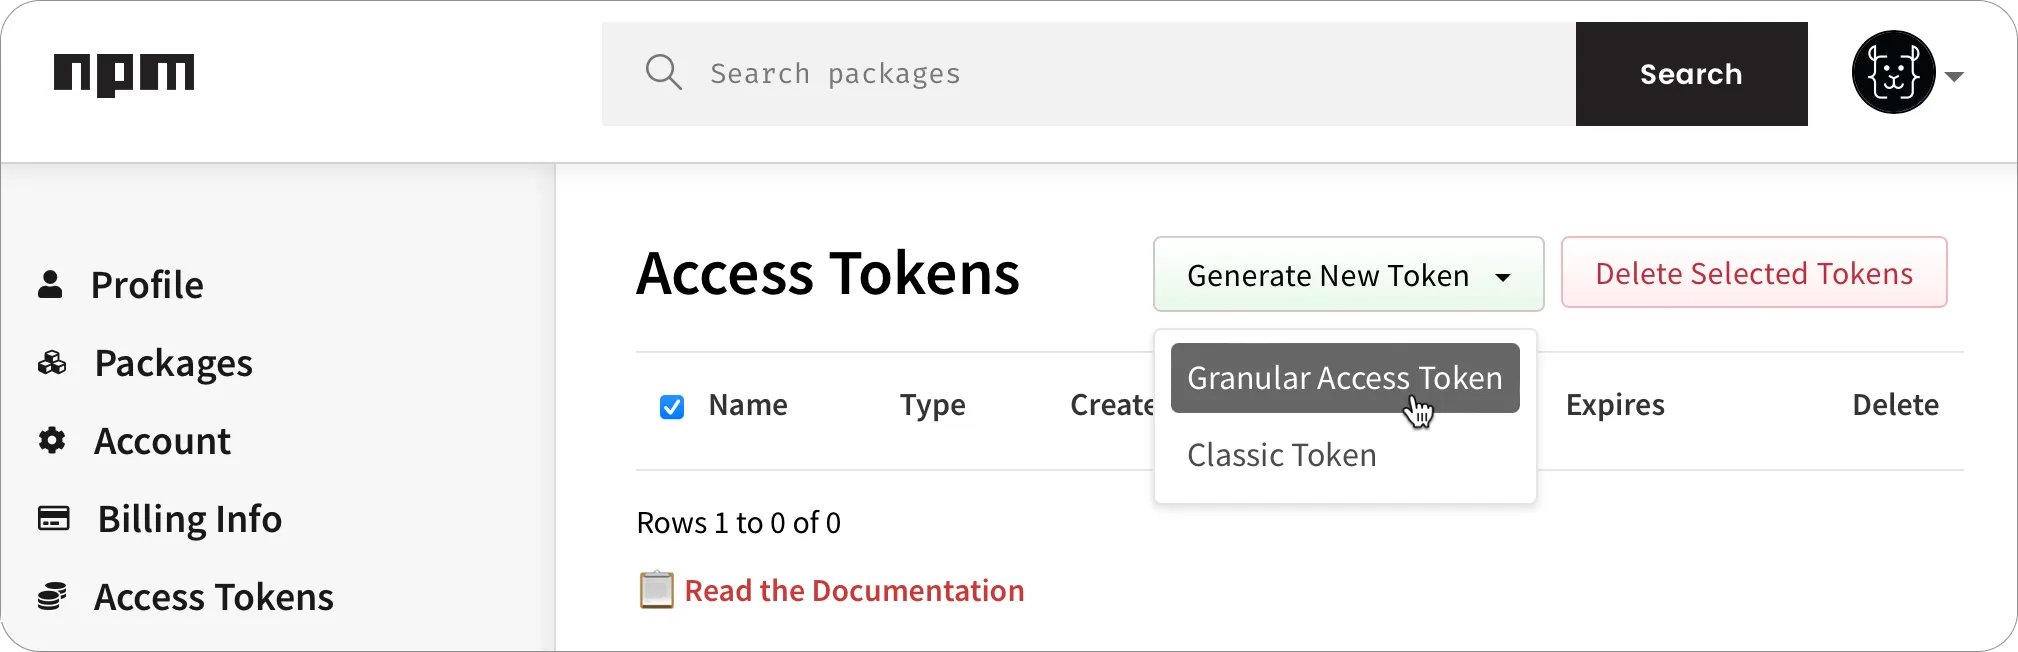
To publish to npm, you will need an npm access token. You can generate a new access token from your user settings on npm.
-
Select the Access Tokens tab, drop down the Generate New Token button, then select Granular Access Token.
-
Fill in all the required details for the token such as the name and expiry.
-
Make sure that this token has read and write permission to publish packages. If the package already exists, you can scope this token to just that package, otherwise this token needs read and write for all packages.
-
Once the token has been created, make a copy of it.
-
In your TypeScript SDK repo, add this token as an Actions secret named
NPM_TOKEN.
You can learn more about creating npm tokens in the npm access tokens documentation.
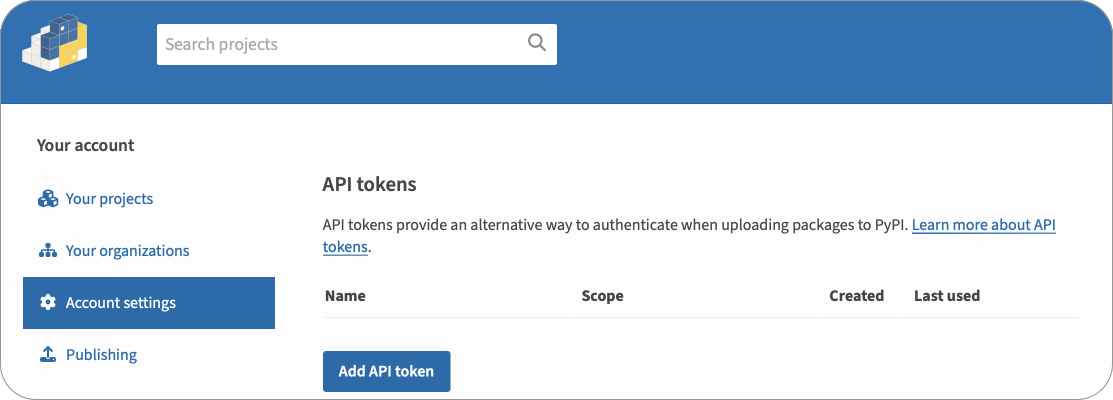
To publish to PyPI you will need an API token. You can generate a new API token from your account settings page on PyPI.
-
Select Account settings, scroll to the API tokens section, then select the Add API token button.
-
Give the token a name.
-
Select the scope for the token. If the package already exists, select that package for the scope, otherwise select Entire account (all packages).
-
Select the Create token button.
-
Once the token has been created, make a copy of it.
-
In your Python SDK repo, add this token as an Actions secret named
PYPI_TOKEN.
You can learn more about creating PyPI tokens in the PyPI API tokens documentation.
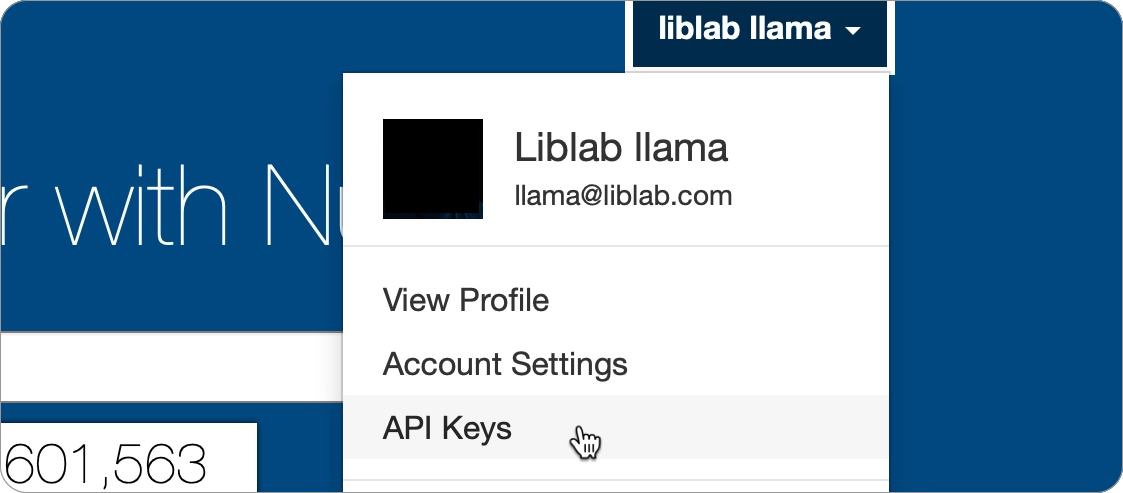
To publish to NuGet, you will need a NuGet API key. You can generate an API key from your account on NuGet.
-
Select your name on the top right, then select the API Keys.
-
From the API Keys page, expand the Create section.

-
Give your API Key a name, and set the required expiry and package owner.
-
Set the scope for this API Key.
- If the package already exists, select Push and Push only new package versions. Then in the Select Packages section, select the package you want to publish updates for.
- If the package does not exist, select Push and Push new packages and package versions, then in the Glob pattern, put
*. This will allow you to push a new package.
-
Select the Create button.
-
Once the API Key has been created, expand the Manage section, and make a copy of it using the Copy button.
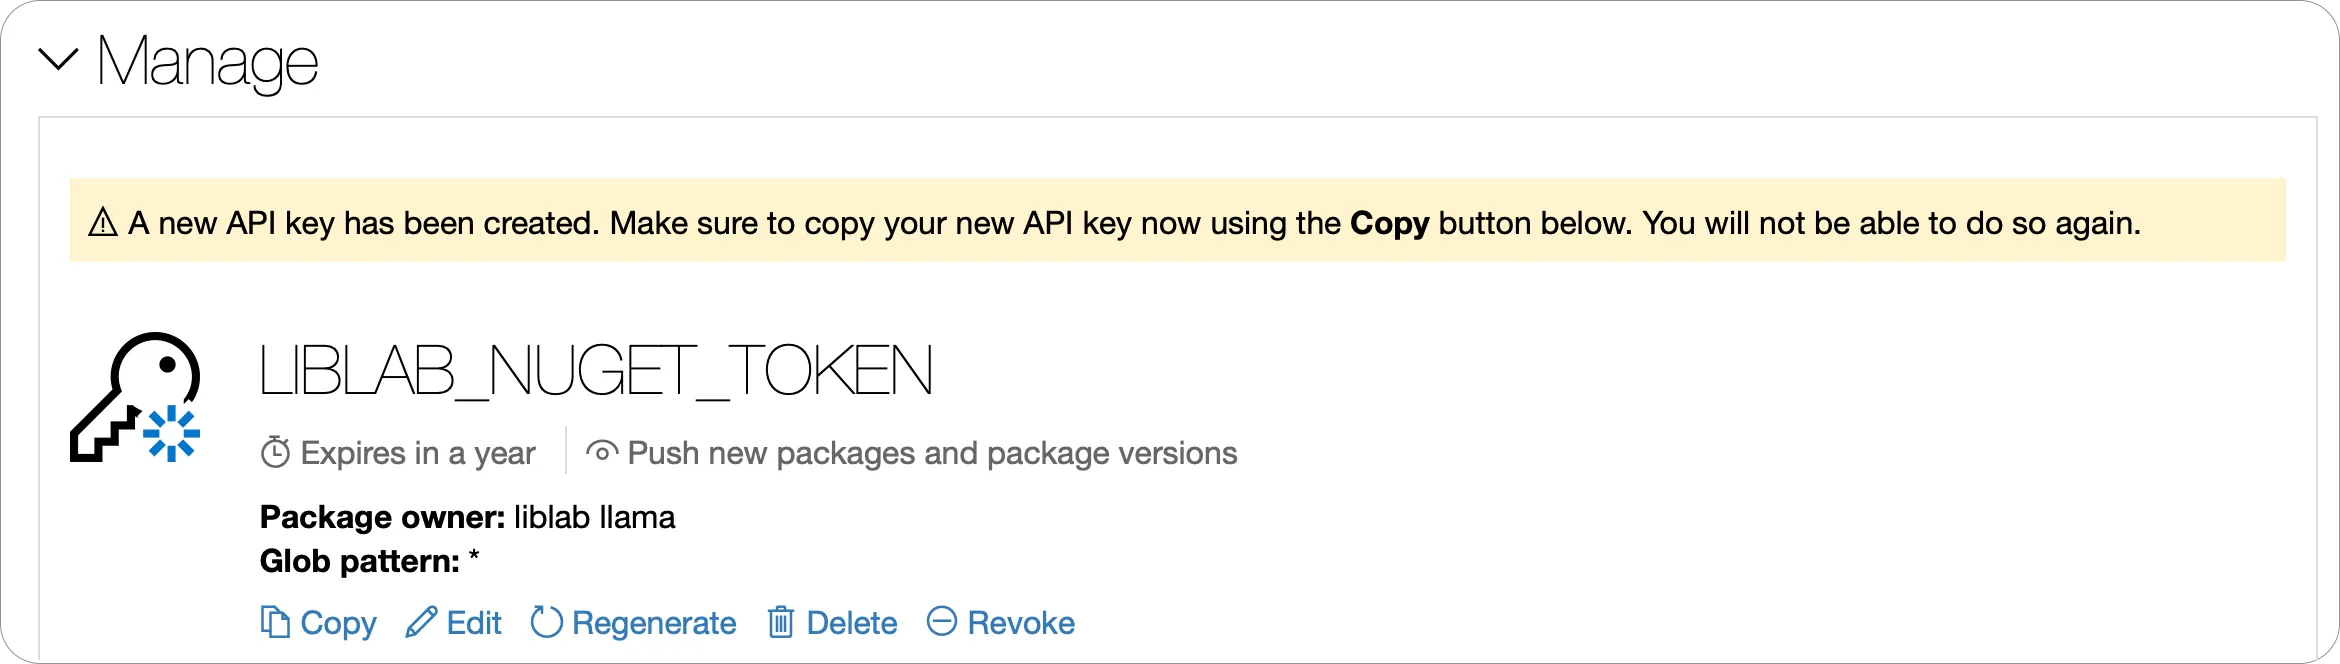
-
In your C# SDK repo, add this token as an Actions secret named
NUGET_TOKEN.
You can learn more about creating NuGet API Keys in the NuGet API Keys documentation.
To publish to the Maven Central Repository, you will need Maven credentials and a GPG key with a passphrase to sign your artifacts.
As of March 12th, 2024, the Central Portal became the default publishing server for Maven packages. At the moment, we do not support automatic publishing through the Legacy OSSRH.
Central Portal Setup
The Central Portal Account Documentation explains how to create an account. An account is required for claiming namespaces, generating credentials and managing package deployments.
Namespace Registration
Your namespace is the crucial prerequisite for publishing a package to the Central Repository as it is the groupId of the package. The Central Repository Namespace Documentation provides detailed instructions for claiming a namespace.
The namespace verification process is not instant.
- For own domain namespaces (e.g.
com.liblab), an additional step is required, which involves setting up the verification key as a DNS record in order for the domain name to be verified by the Central Repository. - For GitHub namespaces (namespace in the form of
io.github.githuborgname), though, verification process is automatic if the user is registered using the GitHub SSO.
Once your namespace is verified, the next step is to generate your Maven credentials.
Generate Maven Credentials
-
Head to the Central Portal at central.sonatype.com, and either create an account, or sign in.
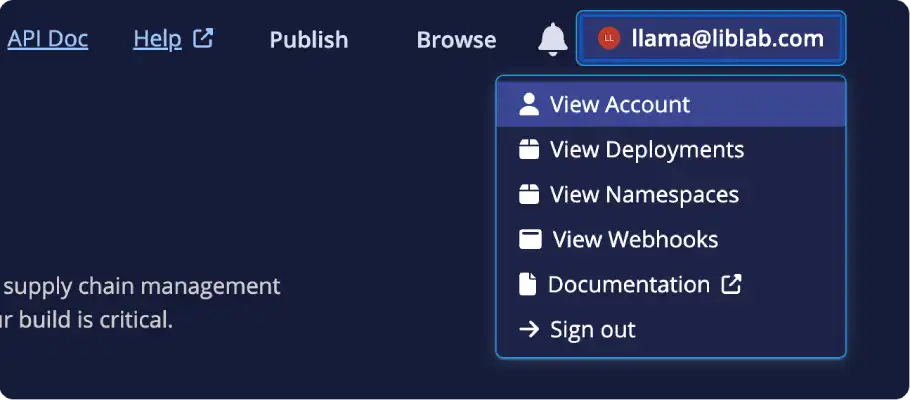
-
Select your email on the top right, then select View Account.
-
From the Account page, select the Generate User Token button.
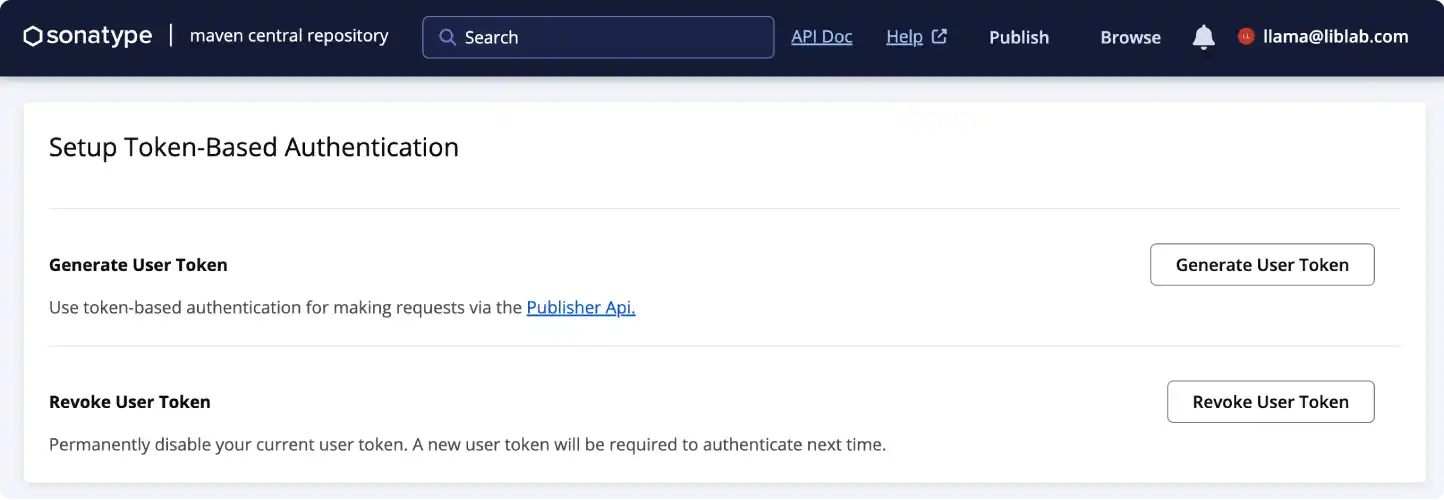
-
When the dialog appears, confirm that you want to generate a new token, and credentials will be generated.

-
In your Java SDK repo, add value of the
Usernamefield as a new GitHub Actions secret calledMAVEN_USERNAMEand the value of thePasswordfield as a secret calledMAVEN_PASSWORD.
You can learn more about creating Central Portal credentials in the Central Portal Documentation.
Generate GPG Key
The Central Repository requires all artifacts to be signed with PGP, such as using a GPG key. You will need to generate your own key pair, distribute it to the key server and obtain the private key, then set this as an other GitHub Actions secret.
The following steps will guide you through the process of creating a GPG key using GnuPG. If you already have a GPG key, you can skip this step. If you want to use a different tool to generate your GPG key, you will need to follow the relevant documentation for that tool.
-
Install GnuPG if you don't have it installed.
-
Initialize the key generation prompt by running:
Terminalgpg --gen-key -
Follow the instructions from
gpg, and choose a passphrase -
Once the key is generated, you will need to get the key id. This is the 40-character hex string on the second line of the
pubsection in the output from generating the key:Terminalpublic and secret key created and signed.
pub ed25519 2024-05-07 [SC] [expires: 2027-05-07]
AB1C2D3456EF78A90BC12D34567890123456789E
uid Exciting Soda <[email protected]>
sub cv25519 2024-05-07 [E] [expires: 2027-05-07] -
Send the key to your key server, such as
openpgpby running the following command:Terminalgpg --keyserver keys.openpgp.org --send-keys <key-id>Replace
<key-id>with the key id you obtained in the previous step. -
Get the private key using the following command:
Terminalgpg --export-secret-keys --armour <key-id>Replace
<key-id>with your key id.Terminal➜ ~ gpg --export-secret-keys --armour AB1C2D3456EF78A90BC12D34567890123456789E
-----BEGIN PGP PRIVATE KEY BLOCK-----
mDMEXEcE6RYJKwYBBAHaRw8BAQdArjWwk3FAqyiFbFBKT4TzXcVBqPTB3gmzlC/U
b7O1u120JkFsaWNlIExvdmVsYWNlIDxhbGljZUBvcGVucGdwLmV4YW1wbGU+iJAE
ExYIADgCGwMFCwkIBwIGFQoJCAsCBBYCAwECHgECF4AWIQTrhbtfozp14V6UTmPy
MVUMT0fjjgUCXaWfOgAKCRDyMVUMT0fjjukrAPoDnHBSogOmsHOsd9qGsiZpgRnO
dypvbm+QtXZqth9rvwD9HcDC0tC+PHAsO7OTh1S1TC9RiJsvawAfCPaQZoed8gK4
OARcRwTpEgorBgEEAZdVAQUBAQdAQv8GIa2rSTzgqbXCpDDYMiKRVitCsy203x3s
E9+eviIDAQgHiHgEGBYIACAWIQTrhbtfozp14V6UTmPyMVUMT0fjjgUCXEcE6QIb
DAAKCRDyMVUMT0fjjlnQAQDFHUs6TIcxrNTtEZFjUFm1M0PJ1Dng/cDW4xN80fsn
0QEA22Kr7VkCjeAEC08VSTeV+QFsmz55/lntWkwYWhmvOgE=
=iIGO
-----END PGP PRIVATE KEY BLOCK----- -
Copy the output from this command, and add it to a new GitHub Actions secret called
GPG_PRIVATE_KEY. -
Create another GitHub Actions secret called
GPG_PASSPHRASE, and set this to the passphrase you chose when generating the key.
Go package management differs from many other languages in that it does not require API tokens for publishing to the Go Packages repository. Unlike some ecosystems where API tokens are necessary to interact with package registries, Go relies on its module proxy system, which integrates seamlessly with GitHub.
As explained in the official publishing tutorial on Go's website, packages are published to the Go Packages repository by tagging a release on GitHub. The Create a release in GitHub section later in this tutorial provides a step-by-step guide on how to create a release in GitHub which will automatically trigger the publishing of the package to the Go Packages repository. Upon creating a release, it should not take longer than one hour for the package to become available on the Go Packages repository.
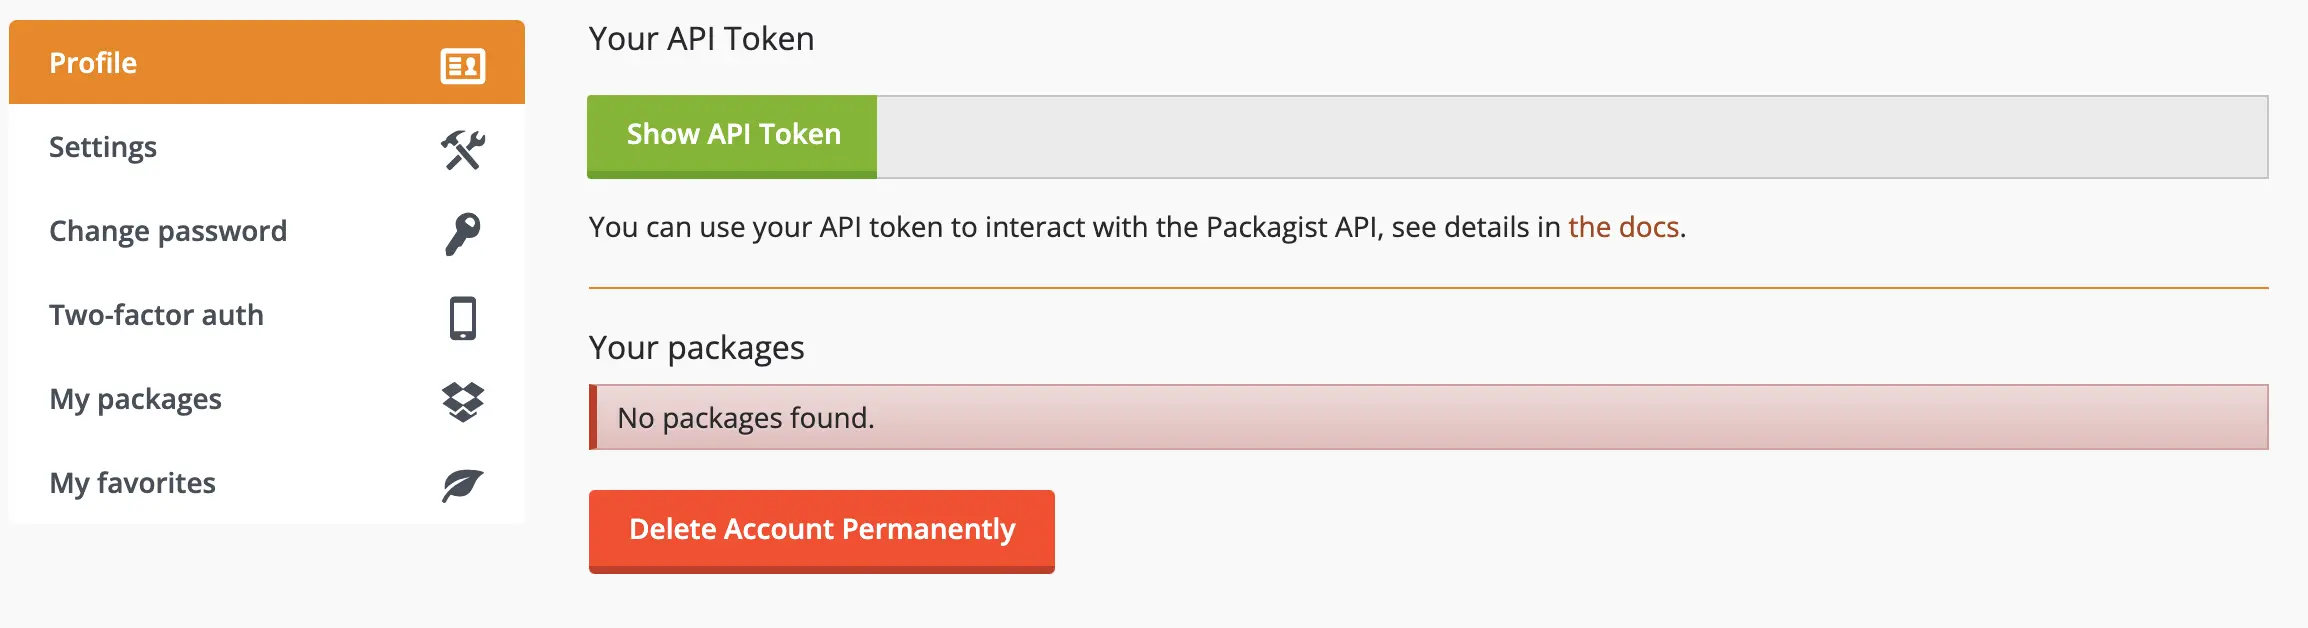
To publish your PHP SDK to Packagist, you will first need an account on Packagist and your Packagist API Token.
-
Create an Account on Packagist or login to Packagist using your GitHub account.
-
Obtain your Packagist API Token from your profile settings
-
In your PHP SDK repo, add this token as an Actions secret named
PACKAGIST_TOKENand set the secretPACKAGIST_USERNAMEto your packagist username as it appears on your profile.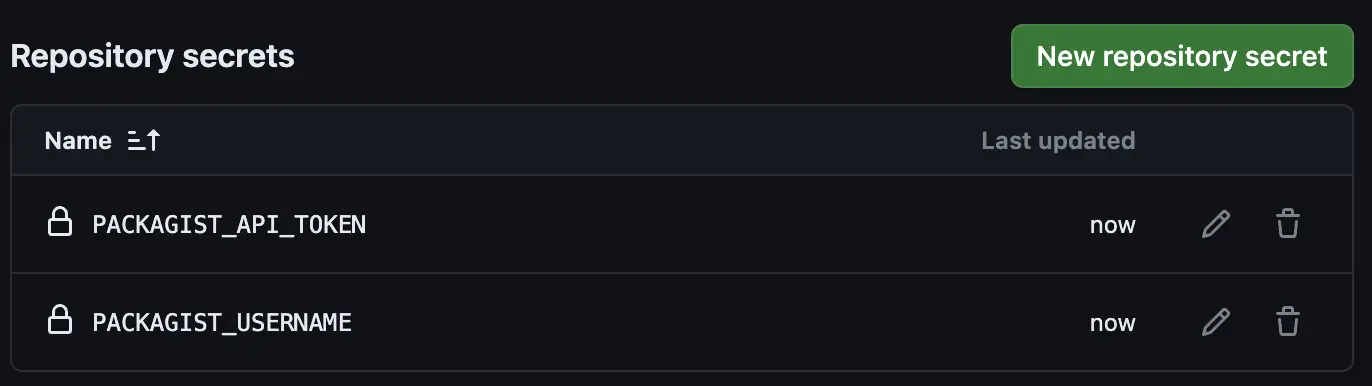
-
Submit your package
- Log in to your Packagist account.
- Go to the Submit tab.
- Enter the URL of your SDK's GitHub repository.
- Select Check to validate the repository and Submit to add your package to Packagist.
At this point, you should have a complete setup.
Update the config file
Now that all your repositories are set up, you'll need to update the liblab.config.json file. Make sure to configure the publishing information and update the settings for each SDK language you plan to publish.
- In the
publishingsection, set thegithubOrgoption to the name of your GitHub organization. - In the
languageOptionssection:-
Update the
githubRepoNamefor each SDK. This should be the repo name only (e.g.,typescript-sdk), not the full GitHub URL (e.g.,https://github.com/myorg/typescript-sdk). -
Set the
sdkVersionto match your desired version number. This should be updated for each new release. -
Configure details for each package manager:
- TypeScript
- Python
- C#
- Java
- Go
- PHP
- Set the
pypiPackageNameoption to the name of your PyPI package. This needs to be unique.
- Set the
packageIdoption to the name of your NuGet package.
- Set the
groupIdoption to your namespace verified by the Maven Central Portal. - Set the
homepageoption to the valid public URL of your SDK homepage. - Add at least one developer to the
developersoption. - (Recommended) Set the
artifactIdoption. If not set, it defaults to the kebab-cased version ofsdkName.
-
Set the
goModuleNameoption to the name of your Go module. This should match the SDK repo name, for examplegithub.com/myorg/go-sdk. -
Ensure your license is set.
noteThe Go Packages License Policy requires that all packages published to the Go Packages repository must include a recognized license file. It is important to note that if the package does not include a recognized license file, only limited package information will be displayed on the Go Packages repository.
For more information on how to specify a license for your SDK, see the license config file option.
- Set the
packageNameoption to the name of your PHP package. It must be in the formatvendor/packageName.
-
There are many other options you can configure for SDK deployment but these are optional. Refer to the config file documentation to learn more.
The following code snippet shows an example of a liblab.config.json file, where SDKs for C#, Python, TypeScript, Go, PHP, and Java are configured for generation and publishing:
Example liblab.config.json configured for SDK deployment
{
  "sdkName": "test-sdk",
  "apiVersion": "1.0.0",
  "apiName": "test-api",
  "specFilePath": "spec.json",
  "languages": [
    "csharp",
    "python",
    "typescript",
    "go",
    "php",
    "java"
  ],
  "languageOptions": {
    "csharp": {
      "liblabVersion": "2",
      "packageId": "Test.SDK",
      "githubRepoName": "csharp-sdk",
      "sdkVersion": "1.0.0"
    },
    "python": {
      "liblabVersion": "2",
      "pypiPackageName": "test-sdk",
      "githubRepoName": "python-sdk",
      "sdkVersion": "1.0.0"
    },
    "typescript": {
      "npmName": "test-sdk",
      "npmOrg": "myorg",
      "githubRepoName": "typescript-sdk",
      "sdkVersion": "1.0.0"
    },
    "java": {
      "groupId": "com.myorg",
      "artifactId": "test-sdk",
      "homepage": "https://myorg.com",
      "githubRepoName": "java-sdk",
      "sdkVersion": "1.0.0",
      "developers": [
        {
          "name": "John Doe",
          "email": "[email protected]",
          "organization": "My Organization",
          "organizationUrl": "https://myorg.com"
        }
      ]
    },
    "go": {
      "goModuleName": "github.com/myorg/go-sdk",
      "githubRepoName": "go-sdk",
      "sdkVersion": "1.0.0",
    },
    "php": {
      "packageName": "myorg/test-sdk",
      "githubRepoName": "php-sdk",
      "sdkVersion": "1.0.0"
    },
  },
  "publishing": {
    "githubOrg": "myorg"
  }
}
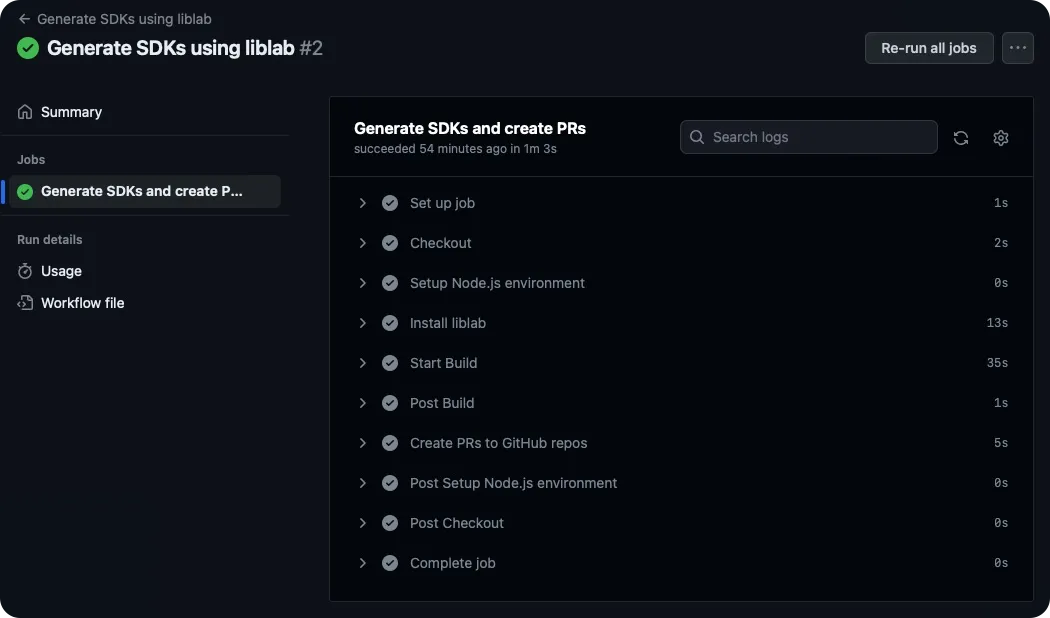
Finally, commit and push your changes to your Control Repo. This will trigger the GitHub Action to generate your SDKs and create PRs in your SDK repos. You can check the progress of this in the Actions tab of your Control Repo.
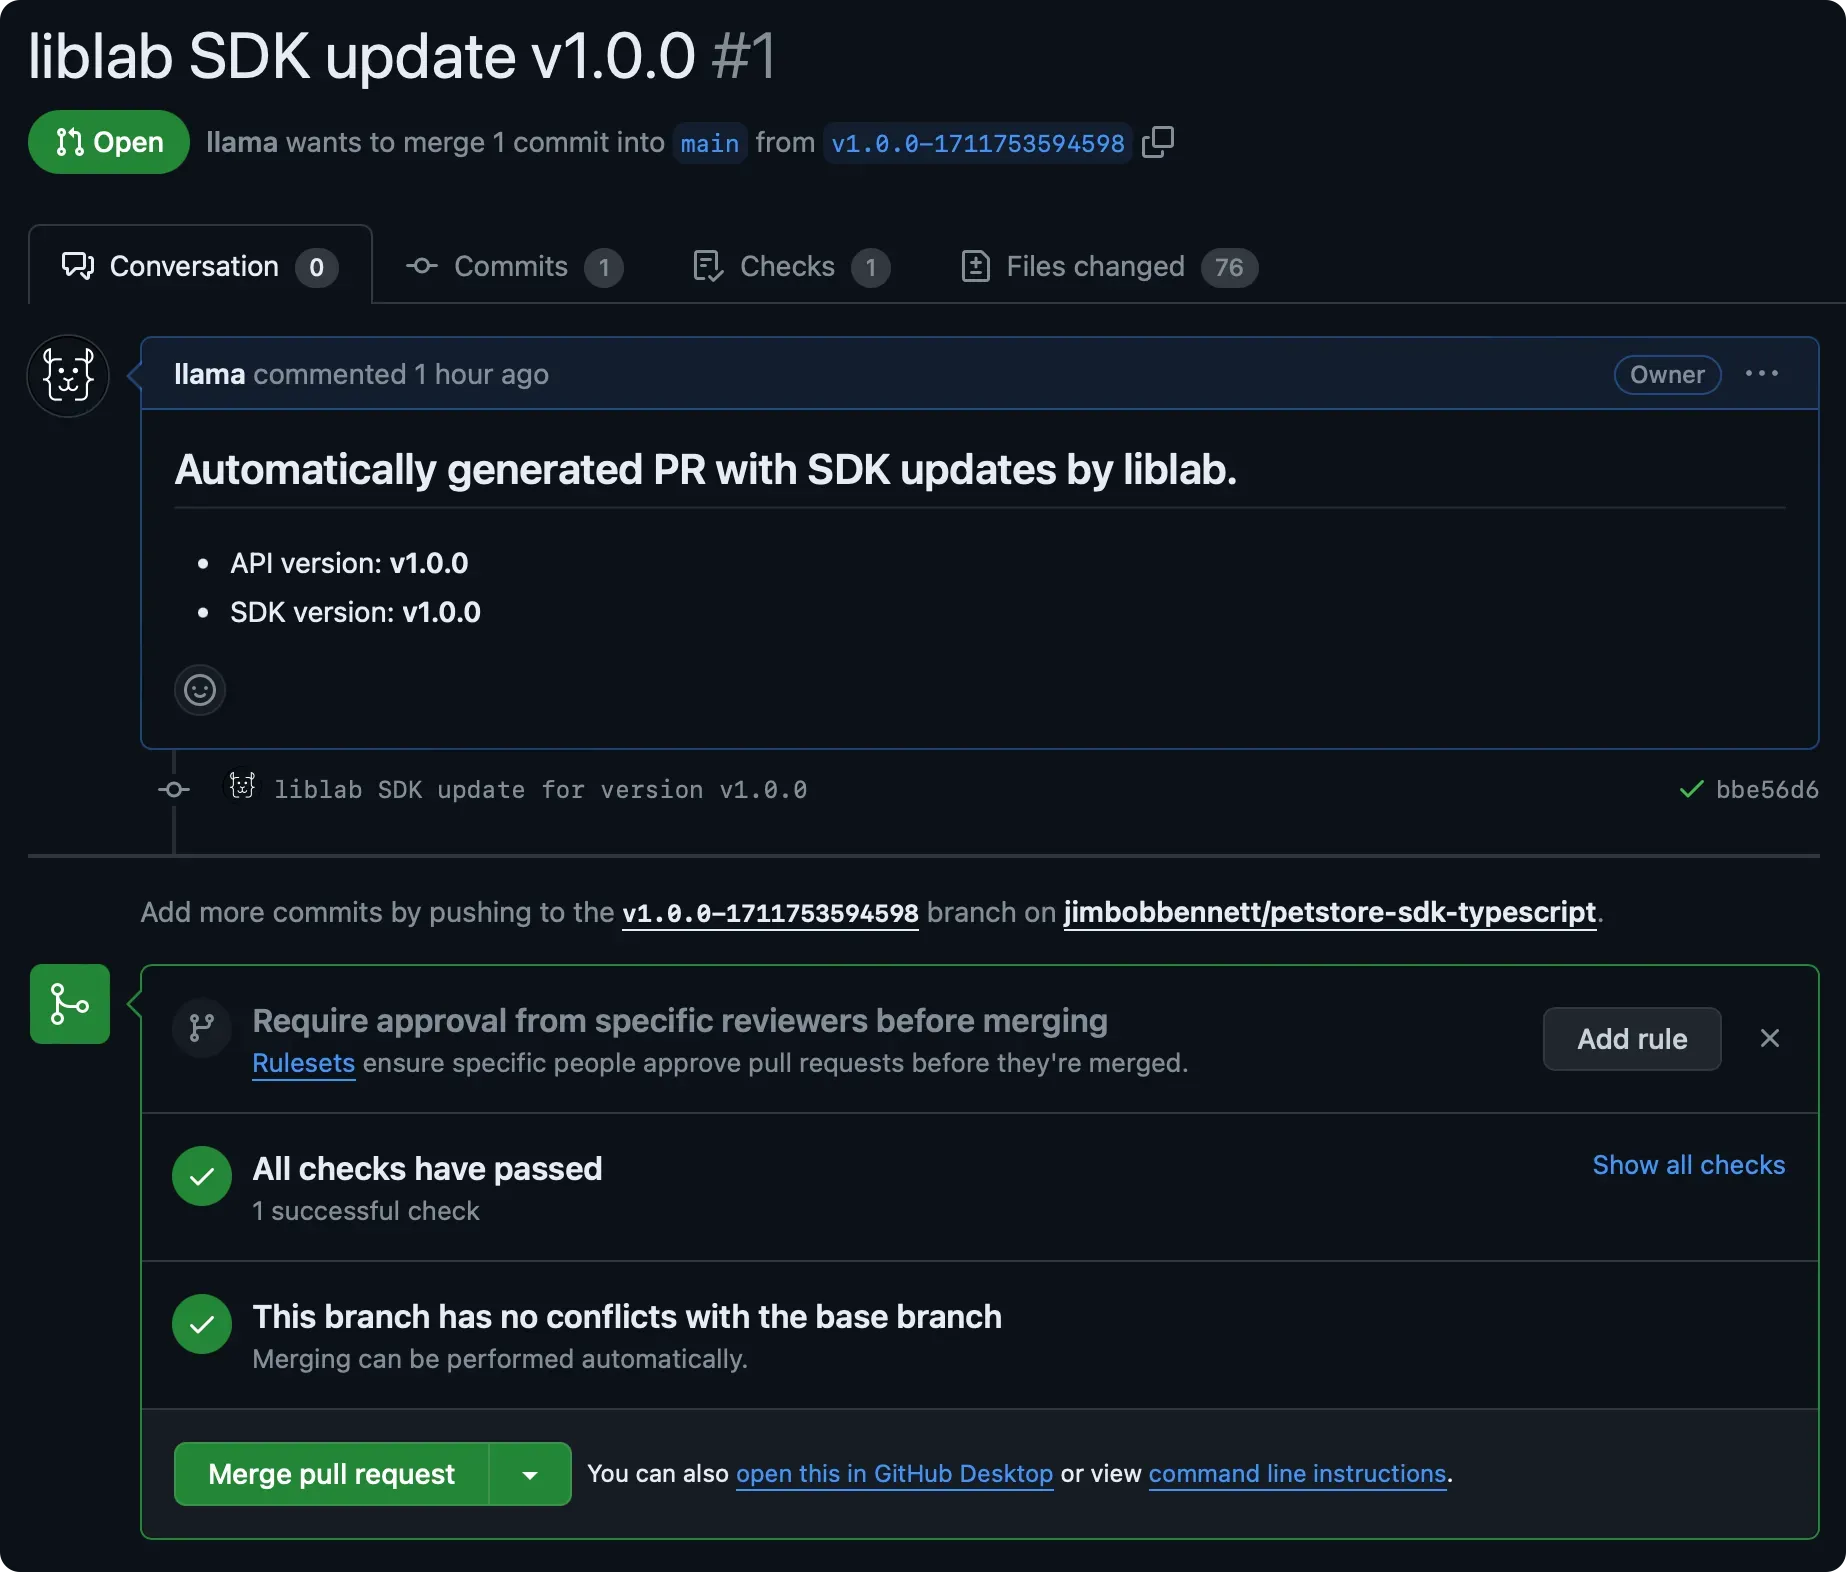
Merge SDK PRs
Once the Control Repo Action is done, you'll see a PR in each SDK repo.
If you don't see the PRs, check the Actions tab in your Control Repo for errors. Check the common errors section for more details.
- Review the PRs to ensure that the changes are correct.
- Once you're happy, approve and merge the PRs.
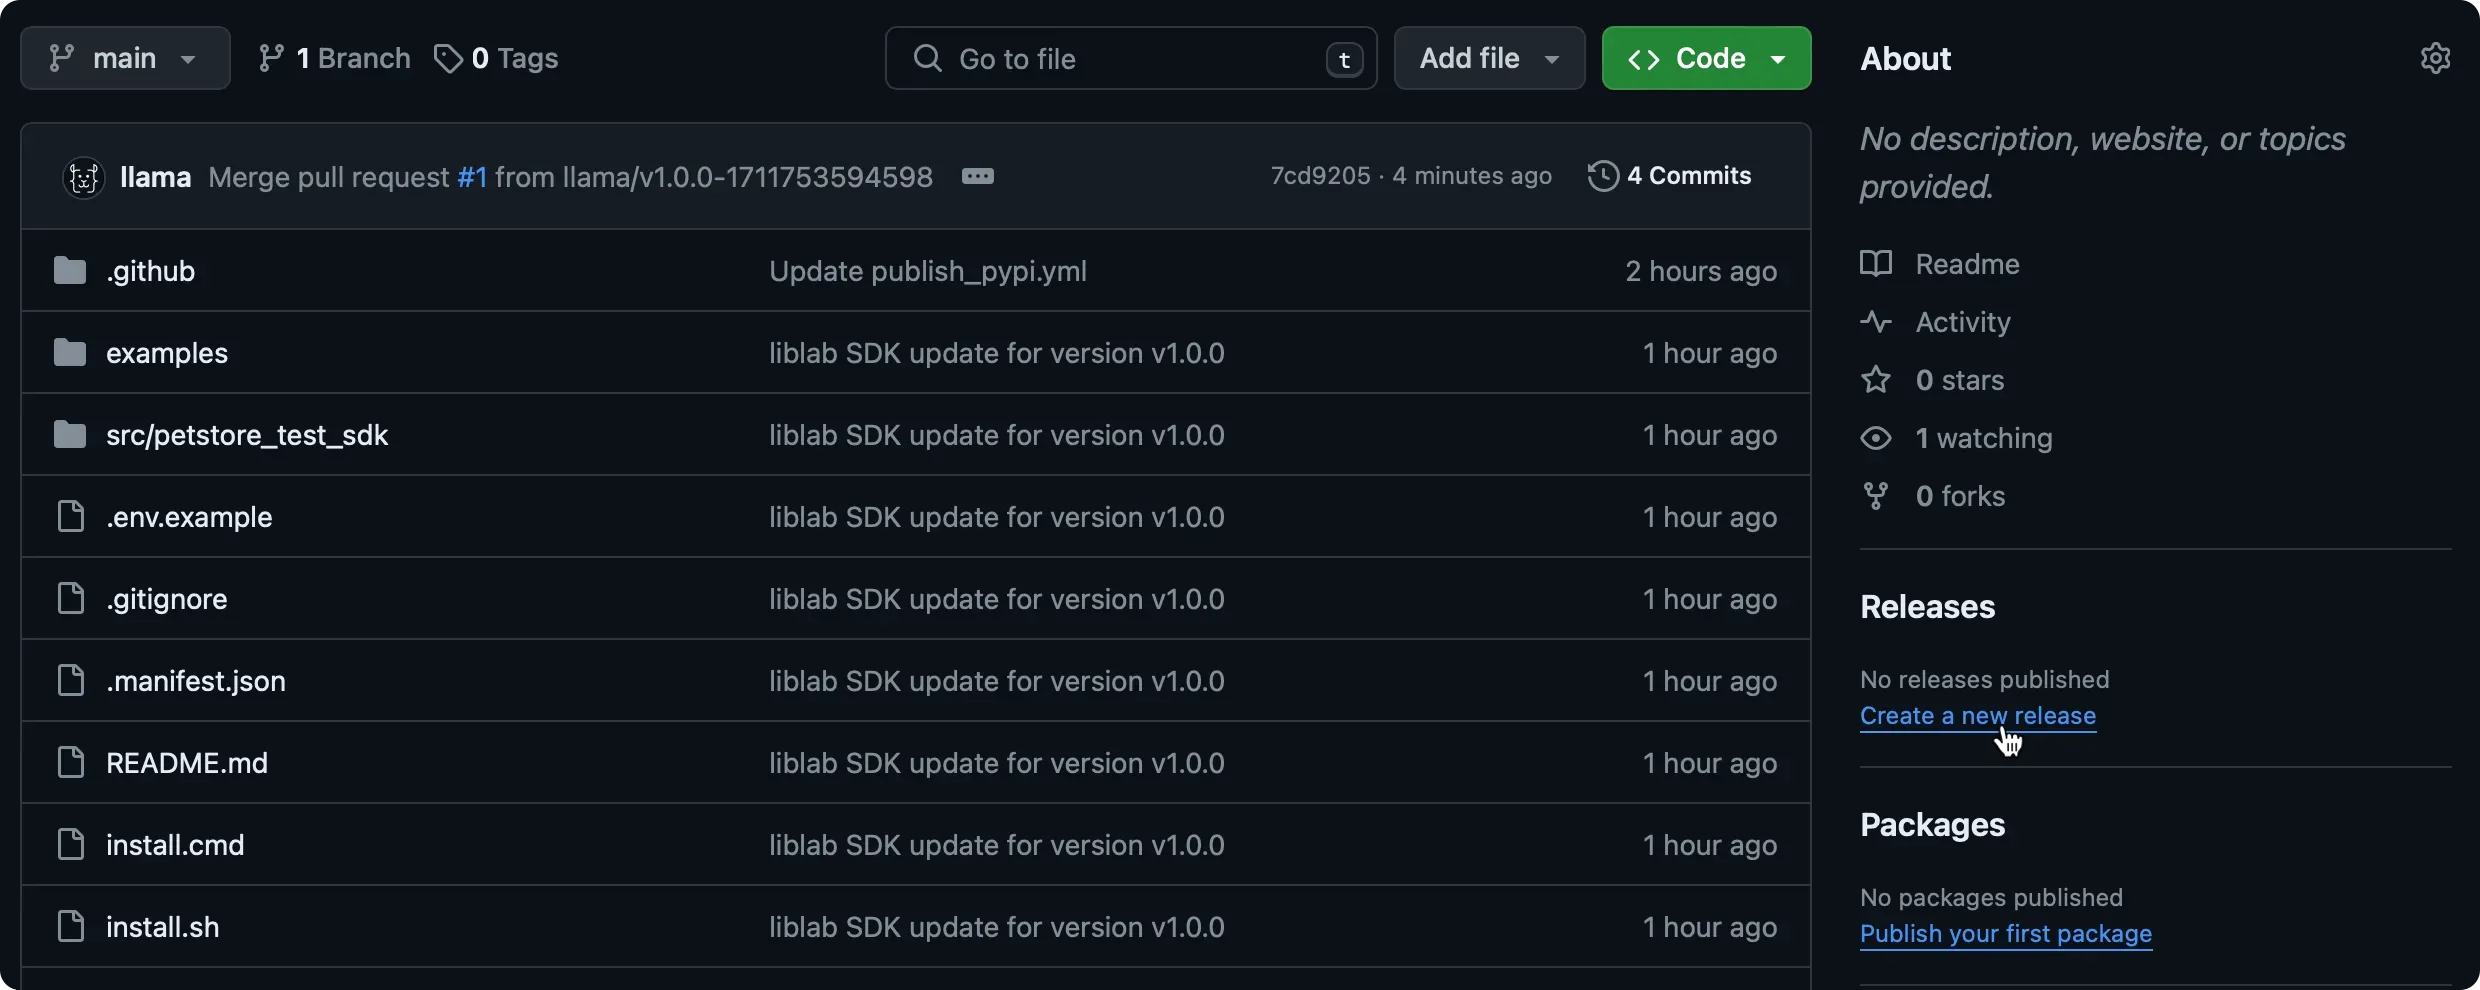
Create a release in GitHub
To trigger the Action to publish your SDK to the package manager, you need to create a release in the SDK repo. Releases need a tag to tag the commit that you want to release.
-
From each SDK repo, go to Releases and click Create a new release.
-
Click Choose a tag, enter a tag (e.g.,
v1.0.0), and select Create new tag.noteThe tag should follow semantic versioning and typically includes a
vprefix, likev1.0.0.Note on Versioning Go PackagesIt is important to note that the release tag version will be used as the version of the package in the Go Packages repository. Therefore, it is important to follow semantic versioning and ensure that the version in the
liblab.config.jsonfile corresponds to the version of the release tag. -
Give the release a title and description. The title can be the same as the tag.
-
Click Publish release. This will trigger the GitHub Action to publish your SDK.
Verify the publish
Once the publishing Action is done, check the package manager to confirm your SDK was published.
You're now fully set up to automatically generate and publish SDKs with liblab and GitHub Actions, ensuring your latest API updates reach users as quickly as possible.
If you don't see the packages, check the Actions tab in each SDK repo for any errors during the publishing process.
Common errors
If your repos are not configured correctly, you may see one of the following errors:
-
If the generate SDKs Action fails with this error:
GitHub Actions outputError: Secrets LIBLAB_TOKEN and LIBLAB_GITHUB_TOKEN are requiredThen refer to the section on setting up Github and Liblab tokens. Double check that the tokens are set correctly, and that they're not expired.
-
If the generate SDKs Action fails with this error:
Error: Unable to create branch for <language>You will need to check the permissions of your GitHub token, or your config file.
- If this is for all SDK languages:
- Verify that the GitHub organization is correctly set in the liblab config file
- Check that your access token has the required permissions for all the SDK repositories listed in your config file
- If you are part of a GitHub organization and not an admin, the access token you create might be pending approval. If you do not have admin permissions, you may have had to fill in a field describing why your personal access token needs access to your organization. In this case, check with your organization admins to approve the token.
- If the error is only for one SDK language, check that the GitHub repo name is correct in the liblab config file options for that language.
- If this is for all SDK languages: