Combine API calls using SDK workflows
Supported SDK languages:
| TypeScript / Javascript | Java / Kotlin | Python | C# | Go | PHP |
|---|---|---|---|---|---|
| ❌ | ❌ | ✅ | ❌ | ❌ | ❌ |
SDKs streamline API integration by abstracting complexity and enhancing the developer experience. With liblab’s SDK Workflows, we further simplify API integration by abstracting complexities and providing tools to enable users to quickly execute common use cases without needing to delve into API details.
In this tutorial we will begin by guiding you through creating an SDK Workflow for a simple use case and then give an overview on how to use SDK Workflows for two more complex use cases: Using a Response in a Subsequent Call and Using User Inputs. Let’s dive in!
Video walkthrough
You can find a video walkthrough of this tutorial on the liblab YouTube channel:
Prerequisites
To compete this tutorial, you will need:
- An API spec
- The liblab CLI installed and logged in
- Arazzo Specification file
Steps
1. Create your Arazzo Specification File
In order to build an SDK with workflows, you need to define an Arazzo Specification file. This file acts as a blueprint for your API interactions, detailing the sequences of API calls and their dependencies to achieve specific outcomes.
What is an Arazzo Specification file?
An Arazzo Specification file is a community-driven, open standard developed under the OpenAPI Initiative, part of the Linux Foundation. It provides a language-independent way to describe sequences of API calls and their dependencies to achieve specific outcomes, similar to how OpenAPI describes HTTP interfaces. The specification allows the SDK Workflows to be expressed in a clear and consistent manner that can be read by both humans and machines, enhancing the experience for both API providers and consumers.
Key use cases for these machine-readable API workflow definitions include:
- Creating interactive and dynamic workflow documentation
- Generating automated documentation for developer portals
- Driving code and SDK generation based on functional use cases
- Automating test case creation
- Conducting automated regulatory compliance checks
- Enabling deterministic API invocations by AI systems
For more information about Arazzo Specification files, refer to the central resources page at Github.
Create the Arazzo Specification file
Before diving into creating SDK Workflows, it's crucial to understand and define the initial structure of your workflow file. This structure sets the foundation for your workflow, specifying the version, metadata, and sources of your API descriptions. Here's a breakdown of the initial fields you'll need to set up:
- arazzo: This field specifies the version of the workflow specification you are using.
- info: This section contains metadata about the workflow file:
- title: A human-readable title for the workflow file.
- summary: A brief description of what the workflow file is about.
- version: The version of the workflow file itself. This is different from the arazzo version and is used to track iterations of your workflow file.
- sourceDescriptions: This array lists the API descriptions that your workflows will interact with. Each item in the array should include:
- name: A unique identifier for the API description. This helps reference the API in your workflows.
- url: The URL where the API description can be found. For our example, we are using the Petstore API.
- type: The format of the API description.
- workflows : This array contains the specification for the workflows. (Check the section below to understand how to build it.
Create a new JSON file to define the workflow structure. In this tutorial, we will refer to this file as workflows-spec.json.
{
   "arazzo":"1.0.0",
   "info":{
      "title":"A petstore workflow example",
      "summary":"This file showcases how utilize workflows",
      "version":"1.0.0"
   },
   "sourceDescriptions":[
      {
         "name":"petStoreDescription",
         "url":"<https://raw.githubusercontent.com/OAI/OpenAPI-Specification/main/examples/v3.0/petstore.json>",
         "type":"openapi"
      }
   ],
   "workflows":[

   ]
}
2. Define a Simple Workflow
This example demonstrates how to perform a single operation within a workflow.Here, we will create a basic workflow that retrieves the details of a pet using a constant ID.
For this example, we will need to fill the following fields:
- workflowId: A unique identifier for the workflow.
- summary: A brief summary of what the workflow does.
- description: A detailed description of the workflow's purpose and functionality.
- steps: An array of steps that define the operations within the workflow. Each step can perform an API operation. Each step should include:
- stepId: A unique identifier for the step.
- description: A brief description of the step's purpose.
- operationId: The identifier of the API operation to be performed in this step.
- parameters: An array of parameters required for the API operation. Each parameter includes:
- name: The name of the parameter.
- in: The location of the parameter (e.g., path, query, header).
- value: The value of the parameter.
- successCriteria: An array of conditions that define the success criteria for the step. Each condition includes:
- condition: An expression that evaluates to true if the step is successful. (See the table below for supported conditions).
- outputs: A dictionary that defines the outputs of the step, which can be used in subsequent steps.
- outputs: A dictionary that defines the final outputs of the workflow, which are derived from the outputs of the steps.
Add this workflow to the workflows array in your workflows-spec.json file.
{
   ...
   "workflows":[
      {
         "workflowId":"getFavoritePet",
         "summary":"Retrieve favorite pet",
         "description":"This workflow retrieves the details of the favorite pet using its ID.",
         "steps":[
            {
               "stepId":"retrieveFavoritePet",
               "description":"Retrieve the details of the favorite pet by its ID.",
               "operationId":"showPetById",
               "parameters":[
                  {
                     "name":"petId",
                     "in":"path",
                     "value":"123"
                  }
               ],
               "successCriteria":[
                  {
                     "condition":"$statusCode == 200"
                  }
               ],
               "outputs":{
                  "favoritePet":"$response.body"
               }
            }
         ],
         "outputs":{
            "favoritePet":"$steps.retrieveFavoritePet.favoritePet"
         }
      }
   ]
   ...
}
In this example, we define an SDK Workflow that consistently retrieves a specific pet using the hypothetical ID 123. This basic case demonstrates how workflows can automatically populate specific parameters for your API call, simplifying the process and reducing the input needed from the end user.
3. Customize your liblab Config file
To generate an SDK with SDK Workflows, you need to set up a liblab config file. Follow these steps to create and configure your libLab config file:
Initialize the liblab Config File
Run the following command to create an initial libLab config file:
liblab init
Add Workflows Definition to the liblab config File
Open the generated config file and add the workflows definition:
{
	...
	"workflows": {
		"path": "workflows-spec.json",
		"outputName": "workflows-tutorial"
	}
	...
}
In this configuration, we define the workflows section with two fields:
- path (required): Specifies the path to the Arazzo Specification file created in the previous step.
- outputName (optional): Defines the name used for the location folder, file, and class names of the workflow.
Generate Python Only
Currently, SDK Workflows are only available for Python v2. For simplicity, you can remove the other languages from your default liblab config file:
{
	...
	"languages": [
		"python"
	],
}
4. Build your Python SDK with SDK Workflows
To generate the Petstore SDK with the SDK Workflow you just created, run the following command:
liblab build
SDK Structure
After the build completes, you should find your SDK in the /output/python directory. Your SDK will have the following structure:
└── src/test_sdk/
├── hooks/
├── models/
├── net/
├── services/
├── workflows_tutorial/
│   ├── workflows_tutorial.py **Here is your workflows file**
│   └── __init__.py
└── sdk.py
At this point, your SDK Workflows file should look like this:
from ..models import (
    GetFavoritePetOutput,
)

class WorkflowsTutorial:
    """
    This file showcases how utilize workflows
    """

    def __init__(self, sdk):
        self._sdk = sdk

    def get_favorite_pet(self) -> GetFavoritePetOutput:
        """Retrieve favorite pet
        This workflow retrieves the details of the favorite pet using its ID.

        ...
        :raises RequestError: Raised when a request fails, with optional HTTP status code and details.
        ...
        :return: GetFavoritePetOutput
        :rtype: GetFavoritePetOutput
        """
        retrieve_favorite_pet = self._sdk.pets.show_pet_by_id(pet_id="123")

        return GetFavoritePetOutput(favorite_pet=retrieve_favorite_pet)
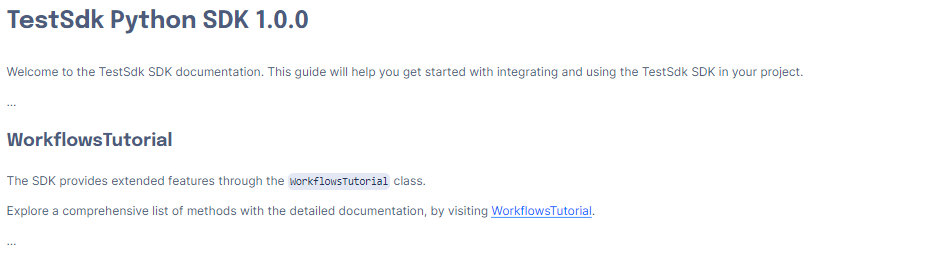
Documentation
Documentation for your SDK Workflow will be integrated with your SDK Documentation. In the main README file, you will have a general workflows section with an index of all available workflows and their descriptions.
README.md
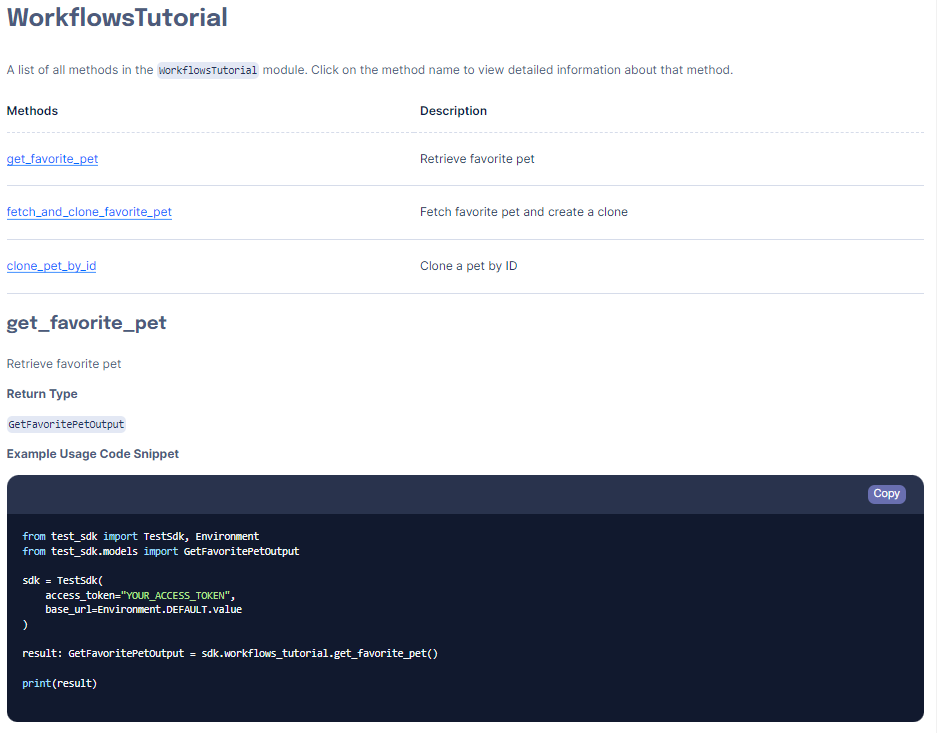
Each SDK Workflow's documentation will contain detailed information on how to use it.
documentation/workflows_tutorial/workflows_tutorial.md
The models documentation will also be updated to include any models generated for the SDK Workflows.
documentation/models/GetFavoritePetOutput.md

5. Running SDK Workflows
SDK Workflows are fully integrated into your SDK. To use them, follow these steps:
Import your SDK
from test_sdk import TestSdk, Environment
Initialize the SDK client
sdk = TestSdk(access_token="YOUR_ACCESS_TOKEN", base_url=Environment.DEFAULT.value)
Access the workflows directly from the client
favorite_pet = sdk.workflows_tutorial.get_favorite_pet()
In this example, workflows_tutorial is the name specified in the liblab_config.json file during the SDK Workflow definition, and it can be customized as desired.
As shown, this workflow automates the process of fetching your favorite pet. This simplified example illustrates the purpose of workflows. We will explore more complex workflow usage examples in the following sections.
6. Additional SDK Workflow Examples by Use Case
Using a Response in a Subsequent Call
Next, we'll create an SDK Workflow that uses the response from one API call as input for another. This demonstrates how to chain operations together.
In this example, the fetchAndCloneFavoritePet workflow retrieves the details of a favorite pet, then uses the retrieved name and tag to create a cloned pet.
...
"workflows":[
   ...
   {
      "workflowId":"fetchAndCloneFavoritePet",
      "summary":"Fetch favorite pet and create a clone",
      "description":"This workflow retrieves the details of the favorite pet using its ID and then creates a clone of it.",
      "steps":[
         {
            "stepId":"retrieveFavoritePet",
            "description":"Retrieve the details of the favorite pet by its ID.",
            "operationId":"showPetById",
            "parameters":[
               {
                  "name":"petId",
                  "in":"path",
                  "value":"123"
               }
            ],
            "successCriteria":[
               {
                  "condition":"$statusCode == 200"
               }
            ],
            "outputs":{
               "petName":"$response.body.name",
               "petTag":"$response.body.tag",
               "petId":"$response.body.id"
            }
         },
         {
            "stepId":"createPetClone",
            "description":"Create a clone of the favorite pet.",
            "operationId":"createPets",
            "requestBody":{
               "payload":{
                  "name":"$steps.retrieveFavoritePet.outputs.petName",
                  "tag":"clone"
               }
            },
            "successCriteria":[
               {
                  "condition":"$statusCode == 201"
               }
            ],
            "outputs":{
               "clonePetResponse":"$response.body"
            }
         }
      ],
      "outputs":{
         "petName":"$steps.retrieveFavoritePet.petName",
         "clonePetResponse":"$steps.createPetClone.clonePetResponse"
      }
   }
   ...
]
...
This SDK Workflow will produce the following code in the SDK:
from ..models import (
    GetFavoritePetOutput,
    FetchAndCloneFavoritePetOutput,
)

class WorkflowsTutorial:
    """
    This file showcases how utilize workflows
    """

    def __init__(self, sdk):
        self._sdk = sdk

    def get_favorite_pet(self) -> GetFavoritePetOutput:
				...

    def fetch_and_clone_favorite_pet(self) -> FetchAndCloneFavoritePetOutput:
        """Fetch favorite pet and create a clone
        This workflow retrieves the details of the favorite pet using its ID and then creates a clone of it.

        ...
        :raises RequestError: Raised when a request fails, with optional HTTP status code and details.
        ...
        :return: FetchAndCloneFavoritePetOutput
        :rtype: FetchAndCloneFavoritePetOutput
        """
        retrieve_favorite_pet = self._sdk.pets.show_pet_by_id(pet_id="123")
        create_pet_clone = self._sdk.pets.create_pets(
            request_body={"name": retrieve_favorite_pet.name, "tag": "clone"}
        )

        return FetchAndCloneFavoritePetOutput(
            pet_name=retrieve_favorite_pet.name, clone_pet_response=create_pet_clone
        )
The generated code delivers a function that automates the process described in the workflow specification to fetch a designated pet and then use the name from that pet in a subsequent call to create a new pet.
You can run this flow by simply calling it from the SDK client:
favorite_pet = sdk.workflows_tutorial.fetch_and_clone_favorite_pet()
Using User Inputs
Finally, we'll create an SDK Workflow that accepts user input for more dynamic interactions.
This example demonstrates how to define inputs for a workflow, allowing for dynamic user interaction. The findAndUpdatePet workflow accepts petId, newName, and newTag as inputs, retrieves the specified pet, and updates its information with the provided new name and tag.
{
	...
	"workflows":[
	   ...
	   {
	      "workflowId":"clonePetById",
	      "summary":"Clone a pet by ID",
	      "description":"This workflow clones a pet by receiving a pet ID as input.",
	      "inputs":{
	         "type":"object",
	         "properties":{
	            "petIdToClone":{
	               "type":"string",
	               "description":"The ID of the pet to clone."
	            }
	         }
	      },
	      "steps":[
	         {
	            "stepId":"retrievePetToClone",
	            "description":"Retrieve the details of the pet to clone by its ID.",
	            "operationId":"showPetById",
	            "parameters":[
	               {
	                  "name":"petId",
	                  "in":"path",
	                  "value":"$inputs.petIdToClone"
	               }
	            ],
	            "successCriteria":[
	               {
	                  "condition":"$statusCode == 200"
	               }
	            ],
	            "outputs":{
	               "petToClone":"$response.body"
	            }
	         },
	         {
	            "stepId":"createPetClone",
	            "description":"Create a clone of the pet.",
	            "operationId":"createPets",
	            "requestBody":{
	               "payload":{
	                  "name":"$steps.retrievePetToClone.petToClone.name",
	                  "tag":"clone"
	               }
	            },
	            "successCriteria":[
	               {
	                  "condition":"$statusCode == 201"
	               }
	            ],
	            "outputs":{
	               "clonePetResponse":"$response.body"
	            }
	         }
	      ],
	      "outputs":{
	         "petToClone":"$steps.retrievePetToClone.petToClone",
	         "clonePetResponse":"$steps.createPetClone.clonePetResponse"
	      }
	   }
	   ...
	]
	...
}
This SDK Workflow will produce the following code in the SDK:
from ..models import (
    GetFavoritePetOutput,
    FetchAndCloneFavoritePetOutput,
    ClonePetByIdInputs,
    ClonePetByIdOutput,
)

class WorkflowsTutorial:
    """
    This file showcases how utilize workflows
    """

    def __init__(self, sdk):
        self._sdk = sdk

    def get_favorite_pet(self) -> GetFavoritePetOutput:
			...

    def fetch_and_clone_favorite_pet(self) -> FetchAndCloneFavoritePetOutput:
        ...

    def clone_pet_by_id(
        self, clone_pet_by_id_inputs: ClonePetByIdInputs
    ) -> ClonePetByIdOutput:
        """Clone a pet by ID
        This workflow clones a pet by receiving a pet ID as input.

        :param clone_pet_by_id_inputs: ClonePetByIdInputs
        :type clone_pet_by_id_inputs: ClonePetByIdInputs
        ...
        :raises RequestError: Raised when a request fails, with optional HTTP status code and details.
        ...
        :return: ClonePetByIdOutput
        :rtype: ClonePetByIdOutput
        """
        retrieve_pet_to_clone = self._sdk.pets.show_pet_by_id(
            pet_id=clone_pet_by_id_inputs.pet_id_to_clone
        )
        create_pet_clone = self._sdk.pets.create_pets(
            request_body={"name": retrieve_pet_to_clone, "tag": "clone"}
        )

        return ClonePetByIdOutput(
            pet_to_clone=retrieve_pet_to_clone, clone_pet_response=create_pet_clone
        )
You can run this flow by simply calling it from the SDK client:
favorite_pet = sdk.workflows_tutorial.clone_pet_by_id_inputs()
Conclusion
By following these steps, you can create SDK Workflows to automate and simplify common API interactions. SDK Workflows enhance your SDK's capabilities, enabling you to provide more value to developers by reducing the complexity of API integration. For more complex scenarios, you can chain multiple operations together or define user inputs to create highly dynamic and flexible workflows.
Feel free to refer to the liblab developer docs for more information and central resources page at Github for examples of Arazzo Specification files. Happy coding!